
Strawberry and Vanilla Striped Cheesecake (no bake!)
This amazing, pink and white striped cheesecake is so quick and simple to make and looks incredible! Topped with chocolate dipped “cherry blossom” strawberries and with a bright, green Matcha Kitkat base, this Japanese-inspired cheesecake is especially perfect during spring…but with the taste of fresh strawberry, vanilla, chocolate, wafer and sweet cream cheese in every bite, this dessert is delicious all year round! :)
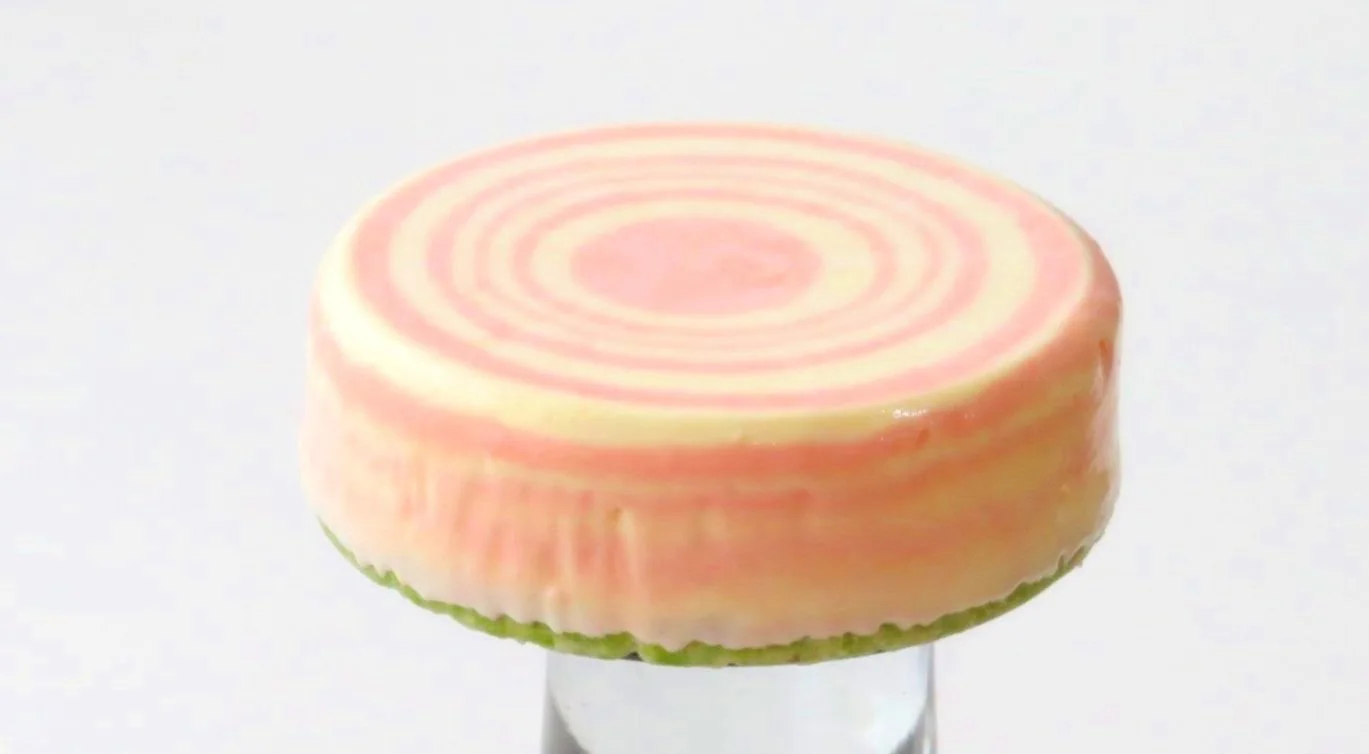
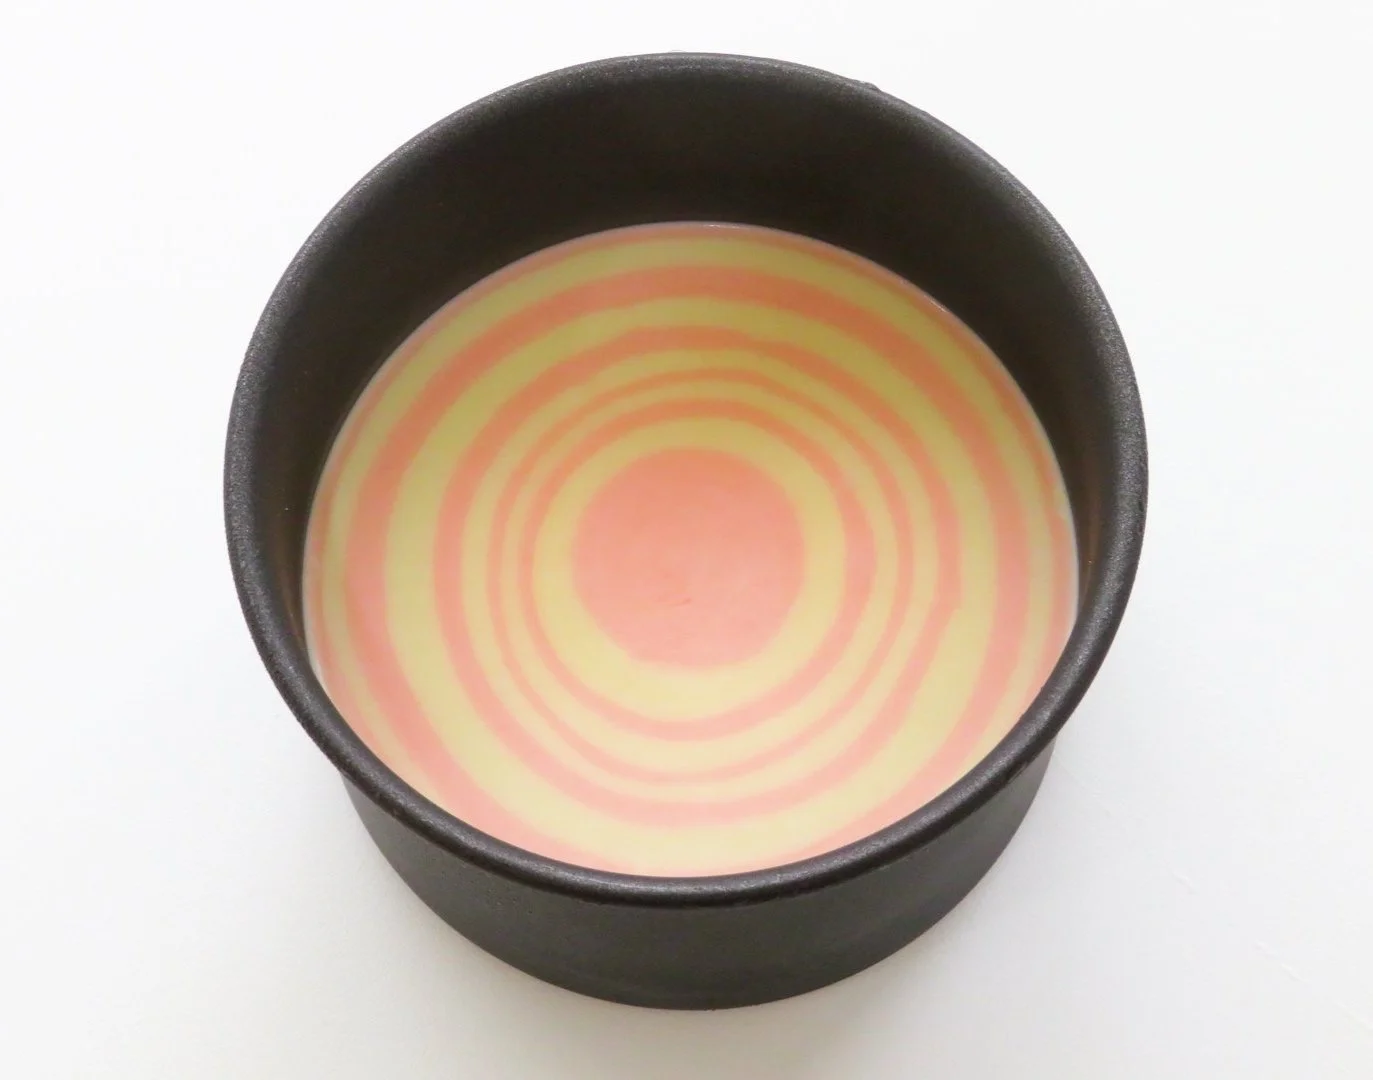
The striped pattern on this cheesecake makes it an absolute showstopper and while you may be left wondering about how difficult this pattern was to make, you’ll be pleasantly surprised to find out that the technique is incredibly simple and gives an amazing appearance all throughout the dessert.

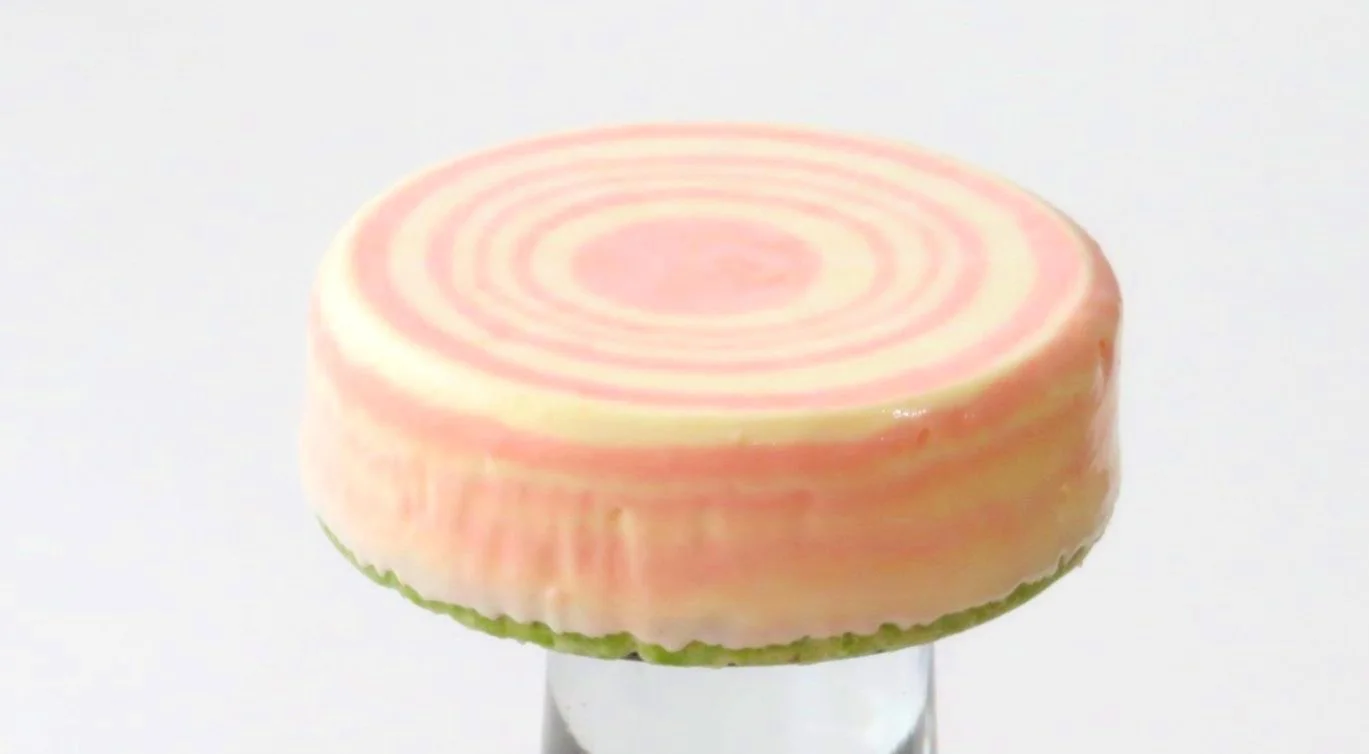
As you can see, the pattern appears as circles or rings on top of the cheesecake and stripes on the sides…but the pattern is also on the inside of the cheesecake too and looks amazing when sliced. And remember these aren’t just colours but flavours too! With the white being a vanilla cheesecake and the pink being a strawberry cheesecake - meaning you get an equal amount of vanilla and strawberry cheesecake flavour in each bite, paired with the Matcha Kitkat base!
I love making cheesecake with Kitkat base from time to time instead of the classic graham cracker base because the Kitkat still has the biscuit-y wafer component but also introduces chocolate to the cheesecake! And when using a flavoured Kitkat like this matcha version, it brings a whole new, added flavour and colour to the dessert!
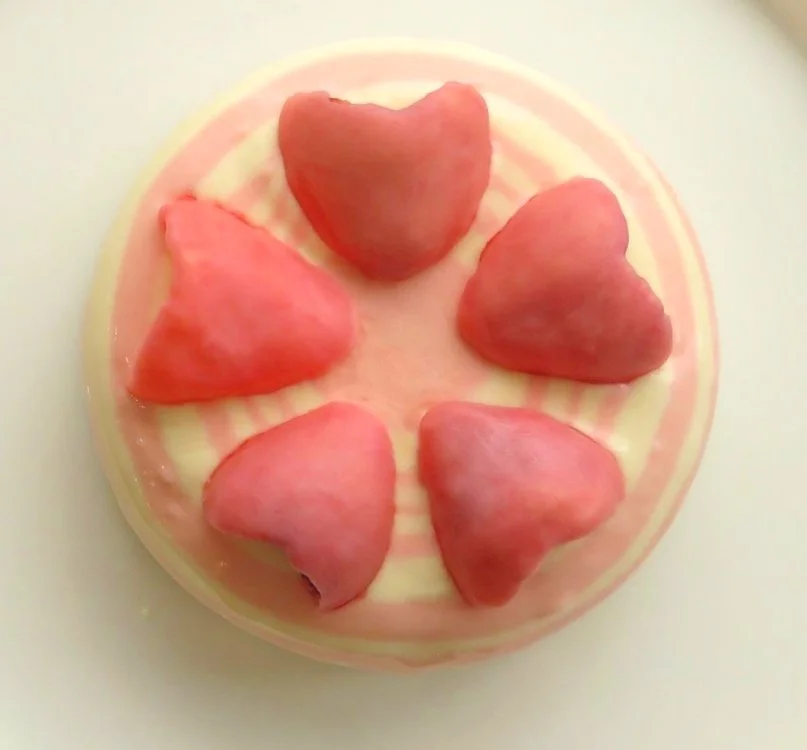
This cheesecake is gorgeous as is, but to complete the look I add pink chocolate-dipped strawberries that have been cut to look like petals and arranged into a cherry blossom as the topping for this cheesecake inspired by Japanese spring and the beautiful season of white and pink cherry blossoms! :)
The fresh strawberries match the flavour of the strawberry cheesecake, while the chocolate coating ties in well with the chocolate in the cheesecake base.
You could do this with white chocolate or place the strawberries uncoated on top of the cheesecake and the bright red colour will still look positively lovely on the pink and white ringed background.

So there are 3 main components to this cheesecake:
Cheesecake Base - 2 ingredients
Cheesecake Filling - 4 ingredients
OPTIONAL
3. Chocolate Dipped “Cherry Blossom” Strawberries - 3 ingredients
Meaning if you omit the strawberries and simply make the cheesecake, this recipe only requires 6 ingredients in total or with the chocolate dipped strawberries 9 ingredients (including food colouring). If you omit the food colouring then only 8 ingredients!
I make this as a mini cheesecake (cake tin 10cm in diameter) which can be shared between two. But feel free to triple or quadruple this recipe and use a larger cake tin to create a standard cheesecake. Or make multiple of these mini cheesecakes to be served separately!
CONTENTS OF THIS RECIPE POST
I always recommend reading the entire post to get the best understanding of the recipe, helpful tips, information about ingredients, storage advice etc. Here’s a look at what topics are included in this recipe post :)
-
-
-
Item description
-
-
-
-
MATCHA KITKAT
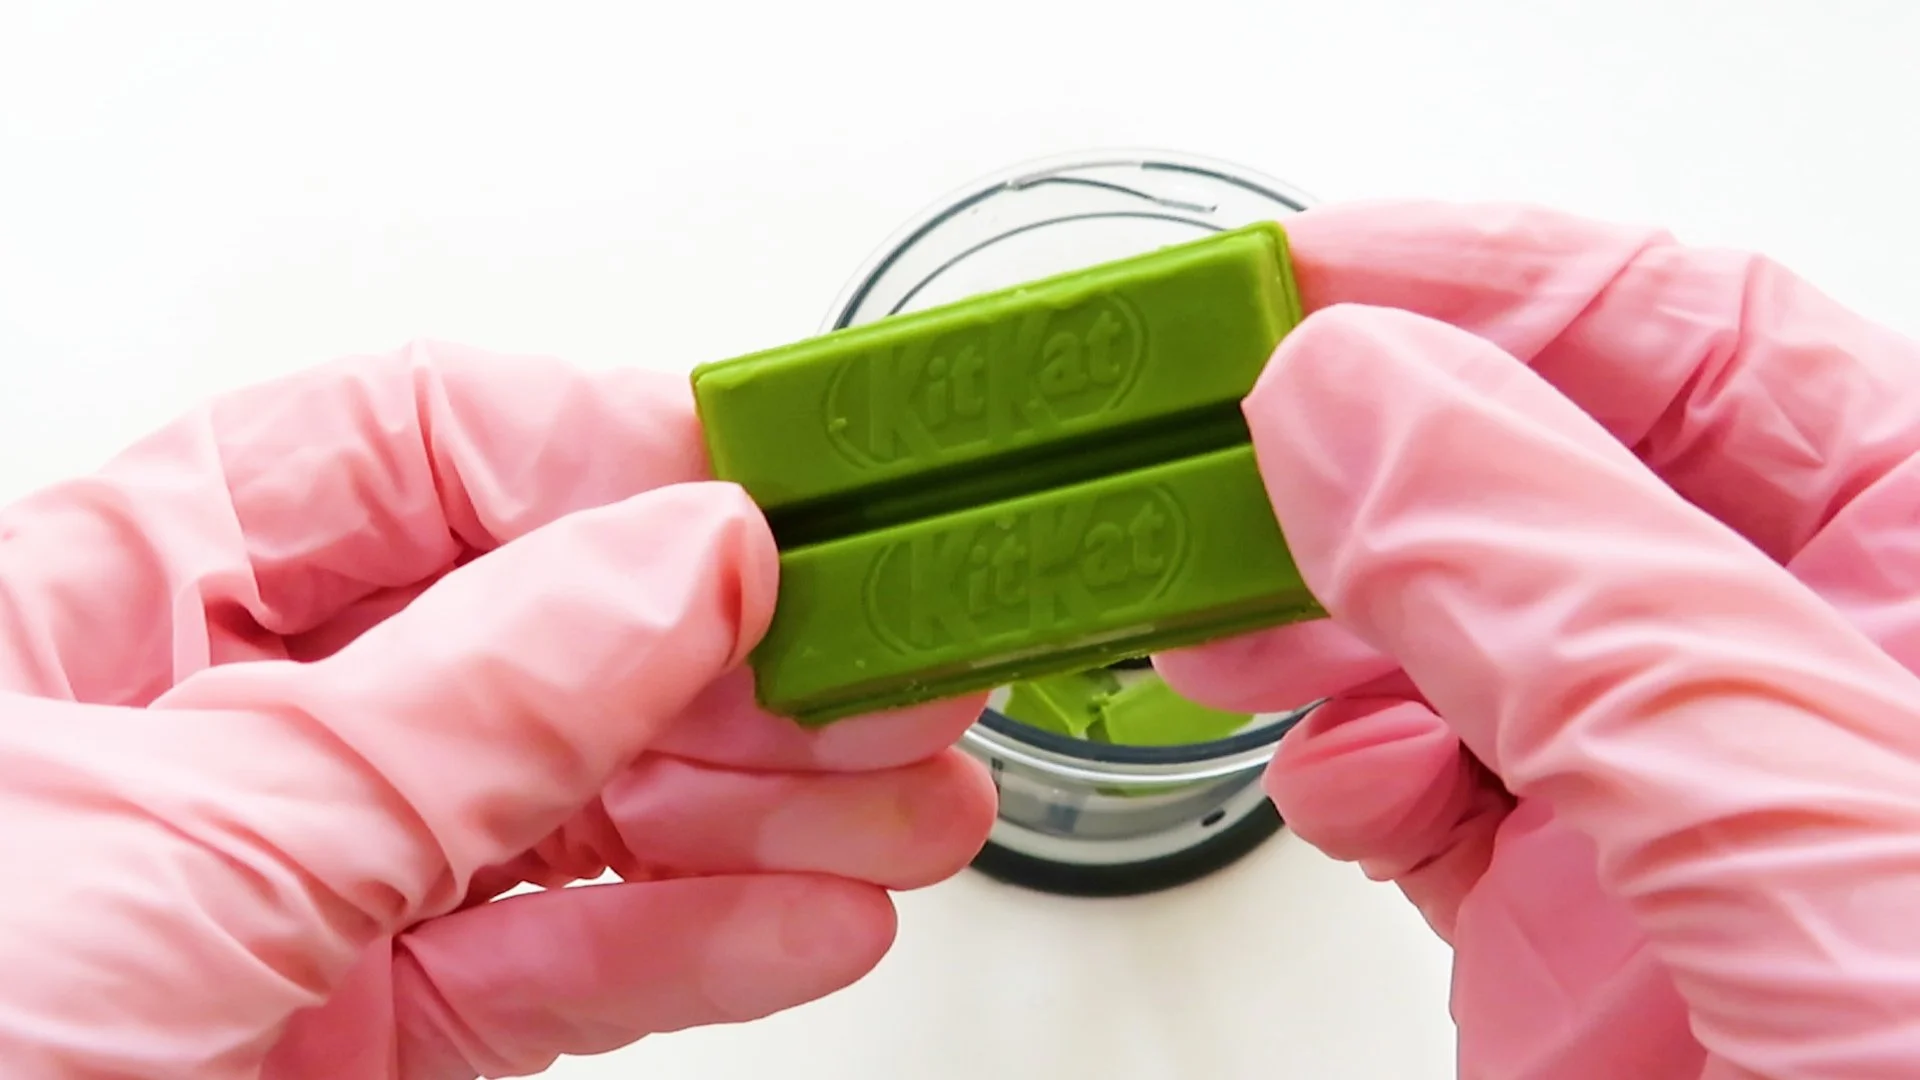
Kitkat has released many different flavours, but not all of their flavours are available in every country. These “Matcha Latte” Kitkat can be found in Japan but I actually came across these by chance in a Japanese grocery store in Sydney, Australia.
You may be able to find these in your local supermarket, Japanese grocer or Asian grocer, but if not, you can simply substitute with ordinary Kitkat or another Kitkat flavour that you like. I chose the Matcha Kitkat for this dessert as the cheesecake is inspired by spring in Japan and the beautiful cherry blossom season, but if you just want to make a striped cheesecake then of course any Kitkat base or even a classic graham cracker base will do!

Much like a graham cracker base, I place these Matcha Kitkats into a food processor and pulse to break them down into crumbs and then mix with melted butter and press into the base of my cake tin. This forms an even layer that will set into the perfect base for this no-bake cheesecake!

WHAT INGREDIENTS GO INTO NO BAKE CHEESECAKE?
The average no-bake cheesecake: Most no-bake cheesecakes are a combination of whipped heavy cream, sour cream, cream cheese, sugar and gelatine, which is then set in the fridge. They are wonderful, but it is a lot of ingredients and more time needed to make the recipe.
This no-bake cheesecake: This cheesecake is comprised of cream cheese and condensed milk. That’s it! Then you can add your optional flavours to enhance taste. For the white part of this cheesecake I add vanilla and for the pink I add strawberry puree. But you could simply use pink food colouring if you don’t have any strawberry puree :) This is by far the simplest and quickest version of no-bake cheesecake and it sets in the freezer rather than the fridge. Because of this, it is similar to an ice cream cake and will start to melt at room temperature, so remember to only remove from the fridge and serve just before eating! :)
FOR THE CHEESECAKE FILLING:
Cream Cheese
It wouldn’t be a cheesecake without cream cheese! This gives the classic cheesecake flavour you know and love and also creaminess and texture to the cheesecake. It is also going to provide the structure and firmness once the cheesecake is set in the freezer.
Sweetened Condensed Milk
This also adds creaminess to the cheesecake as well as the sweetness, so there’s no need to add sugar to this recipe, since the sugar is already contained in the sweetened condensed milk!
Vanilla Extract
I split this cheesecake batter/mixture into 2 separate bowls in order to create the 2 colours you see in this striped cheesecake pattern. For the white colour I flavour with vanilla extract.
Strawberry Puree
For the pink colours I use strawberry puree to both colour and flavour the cheesecake. If you do not have strawberry puree, you could also flavour this half of the cheesecake with vanilla and then simply add pink food colouring, in which case you would have a 2 colour striped vanilla cheesecake, rather than a 2 colour striped strawberry and vanilla cheesecake.
For the easiest homemade strawberry puree, that can be made in the blender in just 1 minute with strawberries, lemon juice and sugar, click here for my How To Make Strawberry Puree post.
FOR THE CHEESECAKE BASE:
Matcha Kitkats
Instead of using crushed graham crackers to make the base of this cheesecake, I use Kitkats! They are delicious, add chocolate as well as biscuit, and they set up perfectly as a no-bake cheesecake base. I quickly break them down into crumbs in a food processor so that I can easily mix them with the melted butter.
I use Matcha Kitkats in this recipe which are a lovely, bright green and add a great pop of colour to this cheesecake that both contrasts and compliments the pink and white stripes, while also matching the Japanese Spring theme of this dessert and the chocolate “cherry blossom” that sits on top of the cheesecake. Of course, if you can’t find Matcha flavoured Kitkat then use any flavour you like or substitute for graham crackers.
Melted Butter
Is mixed through the crumbled Kitkats so that when they are pressed into an even layer on the base of the cake tin they will stick together and set as a perfect no bake cheesecake base!
FOR THE “CHERRY BLOSSOM”:
To top off this Japanese Spring themed cheesecake, I create a sakura a.k.a cherry blossom out of pink chocolate dipped strawberries!
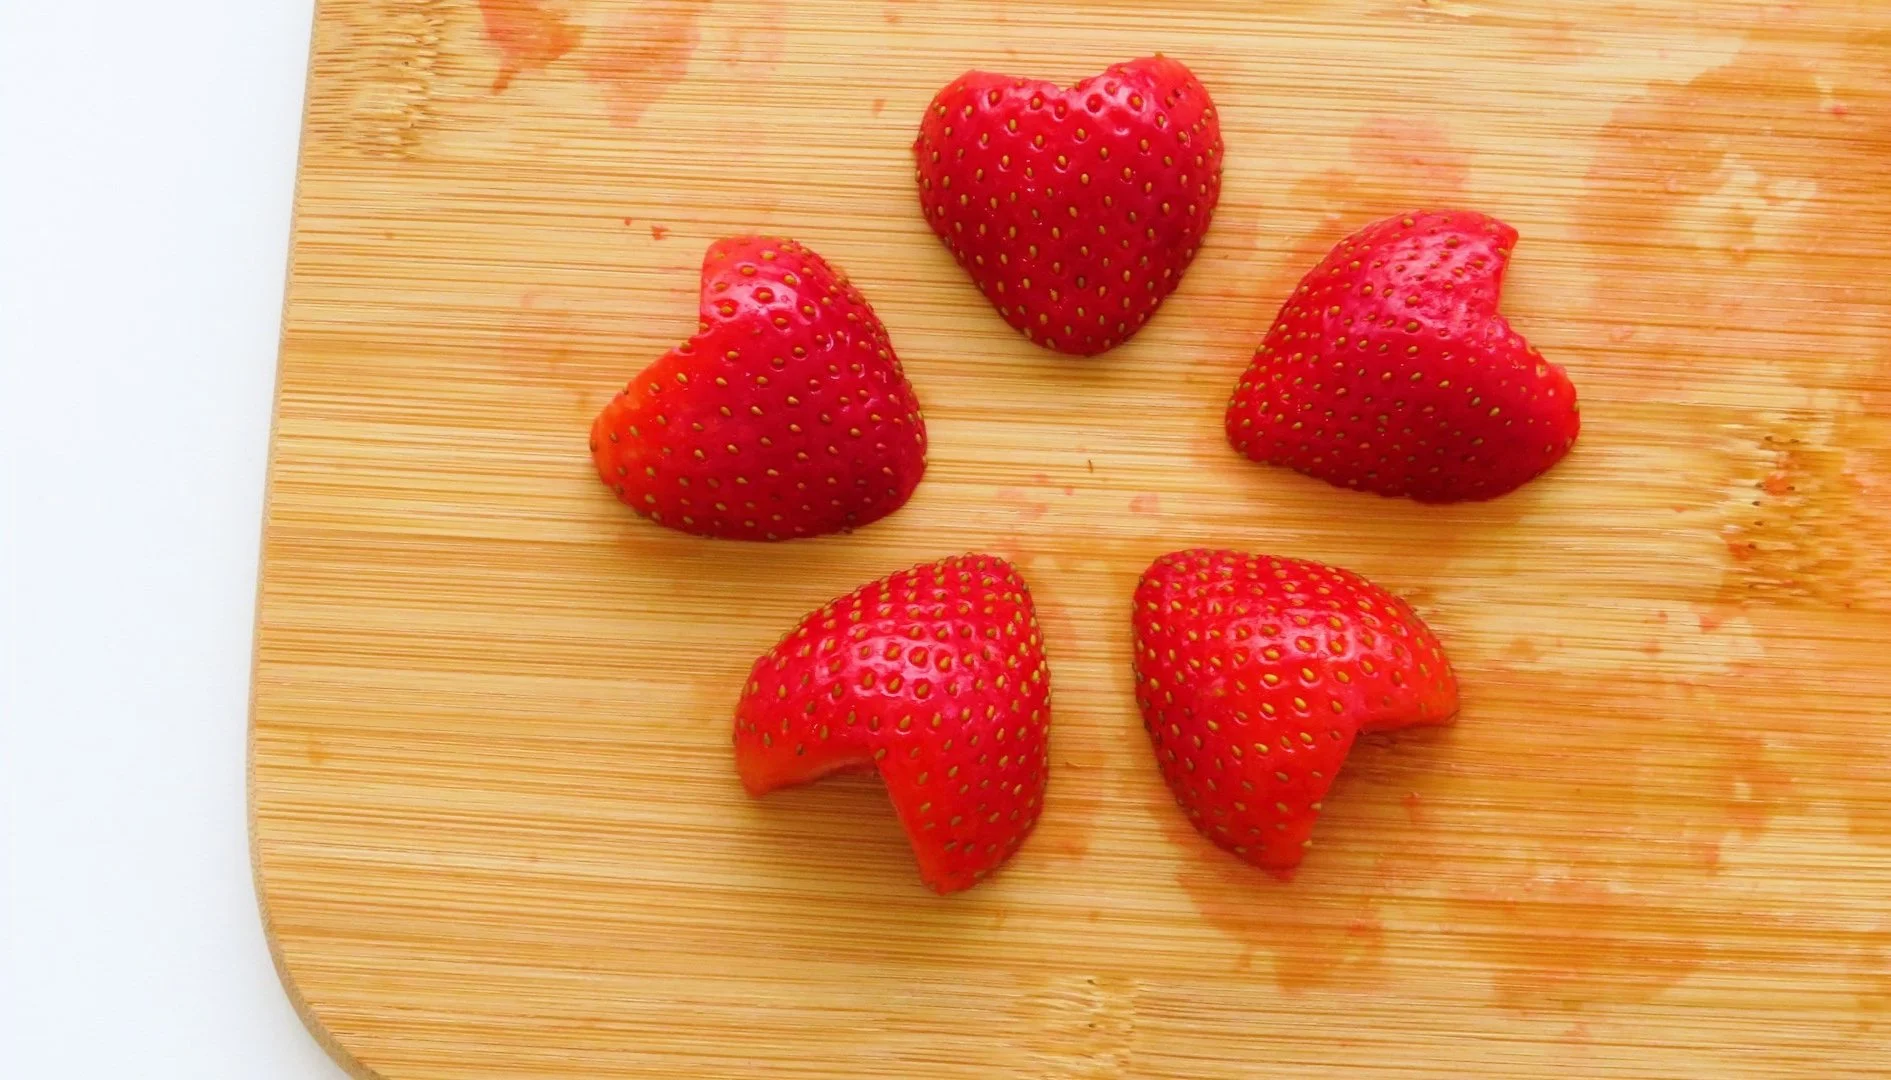
Strawberries
I cut the tops off the strawberries, slice them in half and then slice a triangle out of the top of each strawberry half (see video) to create a petal shape. When 5 of these “petals” are arranged together, they give the shape and appearance of a cherry blossom! You could stop here and simply use the strawberries as a garnish, but if you want to go all out and complete the effect, dip the strawberries into pink or white chocolate and you will have a beautiful pink cherry blossom decoration for your cheesecake!
Oil Based Food Colouring
To create pink chocolate, I melt white chocolate and add red (or pink) oil based food colouring a little bit at a time. It is very important that you use OIL BASED food colouring when colouring chocolate. Water based food colours and gel based food colours will cause the chocolate to seize, meaning it will become thick and pasty and you won’t be able to properly dip strawberries in it. If you don’t have any oil based food colouring on hand, don’t worry :) some cherry blossoms are white not pink so you can simply create a white chocolate cherry blossom to top your cheesecake and it will still look beautiful with the pink and white stripes beneath!
White Chocolate
You need to melt just a small amount of white chocolate for dipping the strawberries. Nevertheless, when dipping strawberries you will always end up with some extra chocolate left over, but that’s what spoons are for!
REMEMBER! Only use OIL BASED food colouring to colour chocolate. If you use water based or gel based food colouring the chocolate will seize!
CHOCOLATE DIPPED “CHERRY BLOSSOM” STRAWBERRIES
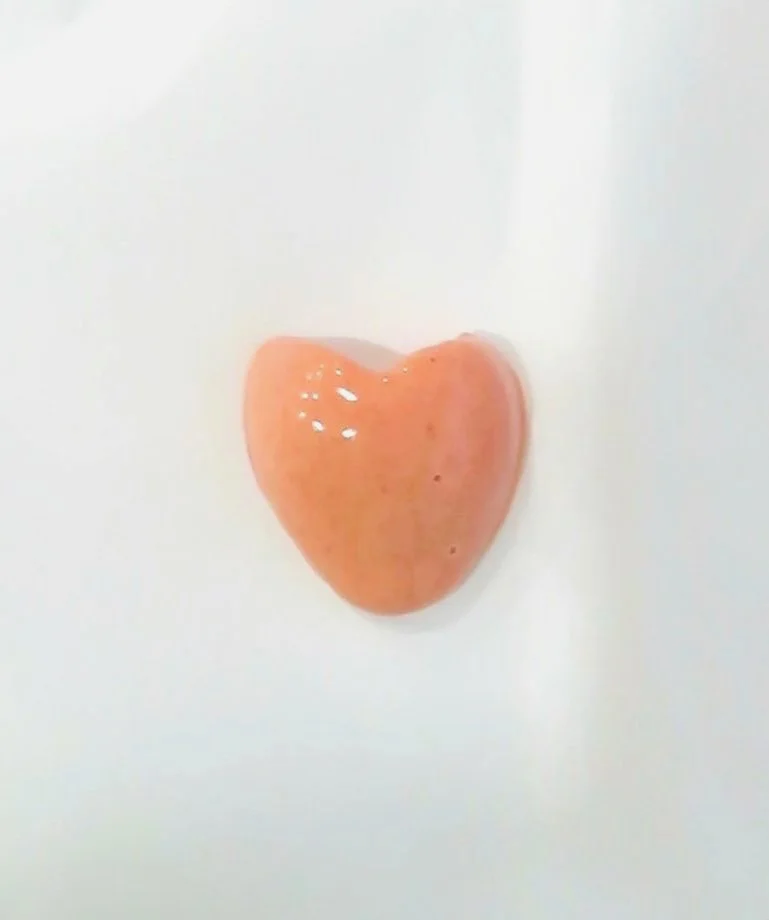
Firstly I skewer the strawberry “petals” on toothpicks. Next I melt and colour the white chocolate and then transfer it to a narrow, tall vessel, to make it easier to dip the strawberries. Once the I have coated each strawberry in pink chocolate, I place them on a tray lined with baking paper, gently slide out the toothpick and allow the strawberries to set in the fridge. (Placing the baking paper on a tray, makes it easier to lift and move the strawberries into the fridge).
If you don’t want what is called a “foot” - basically extra chocolate that pools around the base - to develop around your chocolate dipped strawberry, hold it for a few seconds above the chocolate after it’s been dipped to allow any excess chocolate to drip off.

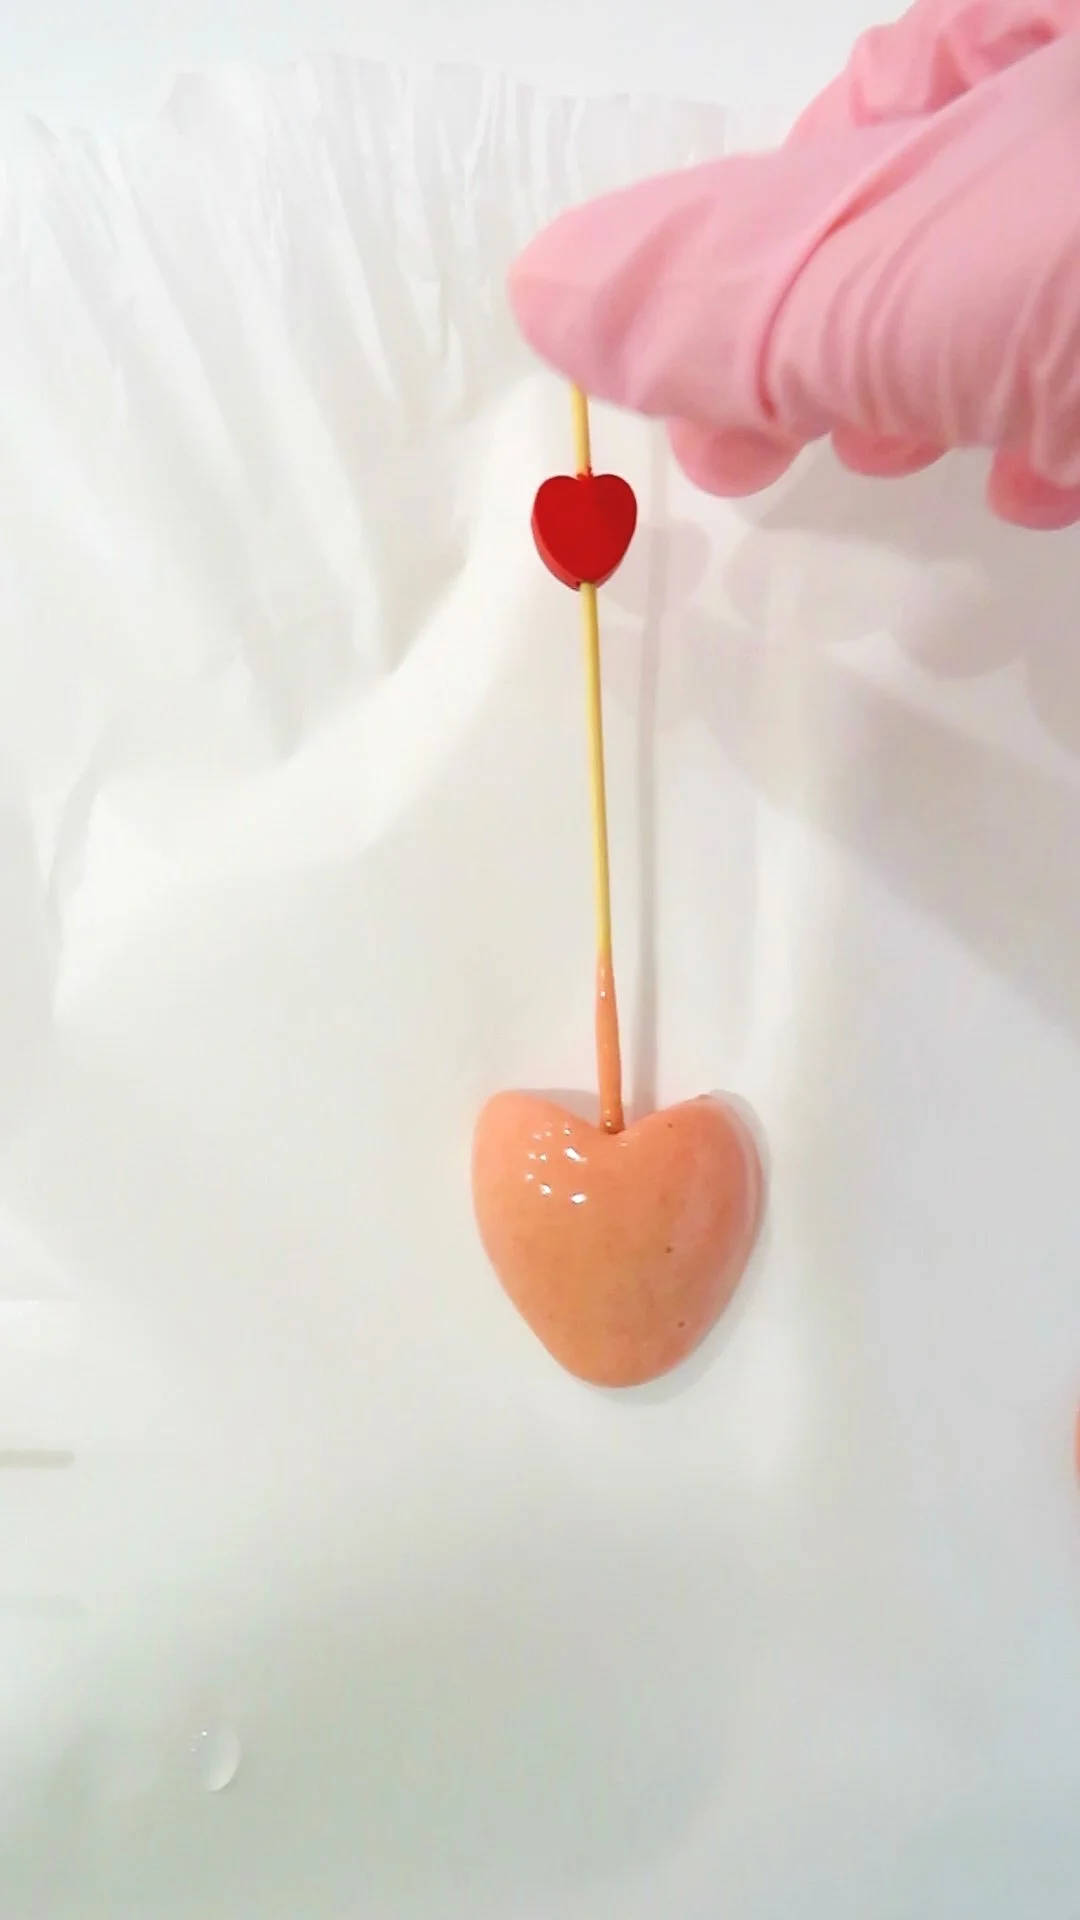
PRO TIP: Pour your melted chocolate into a narrow and tall vessel like the one in the picture above, to make coating the strawberries easier and quicker!
HOW TO CREATE THE STRIPED PATTERN
It is so easy to create the mesmerising striped pattern you see in this cheesecake!
There are 2 main steps:
Split your cheesecake batter
After whipping the cream cheese, I divide it equally into 2 separate bowls, then add equal amounts of condensed milk to each.
To the first bowl I add vanilla extract and to the second bowl I add strawberry puree.
I then beat both of these (vanilla first to keep beaters clean) and end up with white cheesecake filling and pink cheesecake filling.
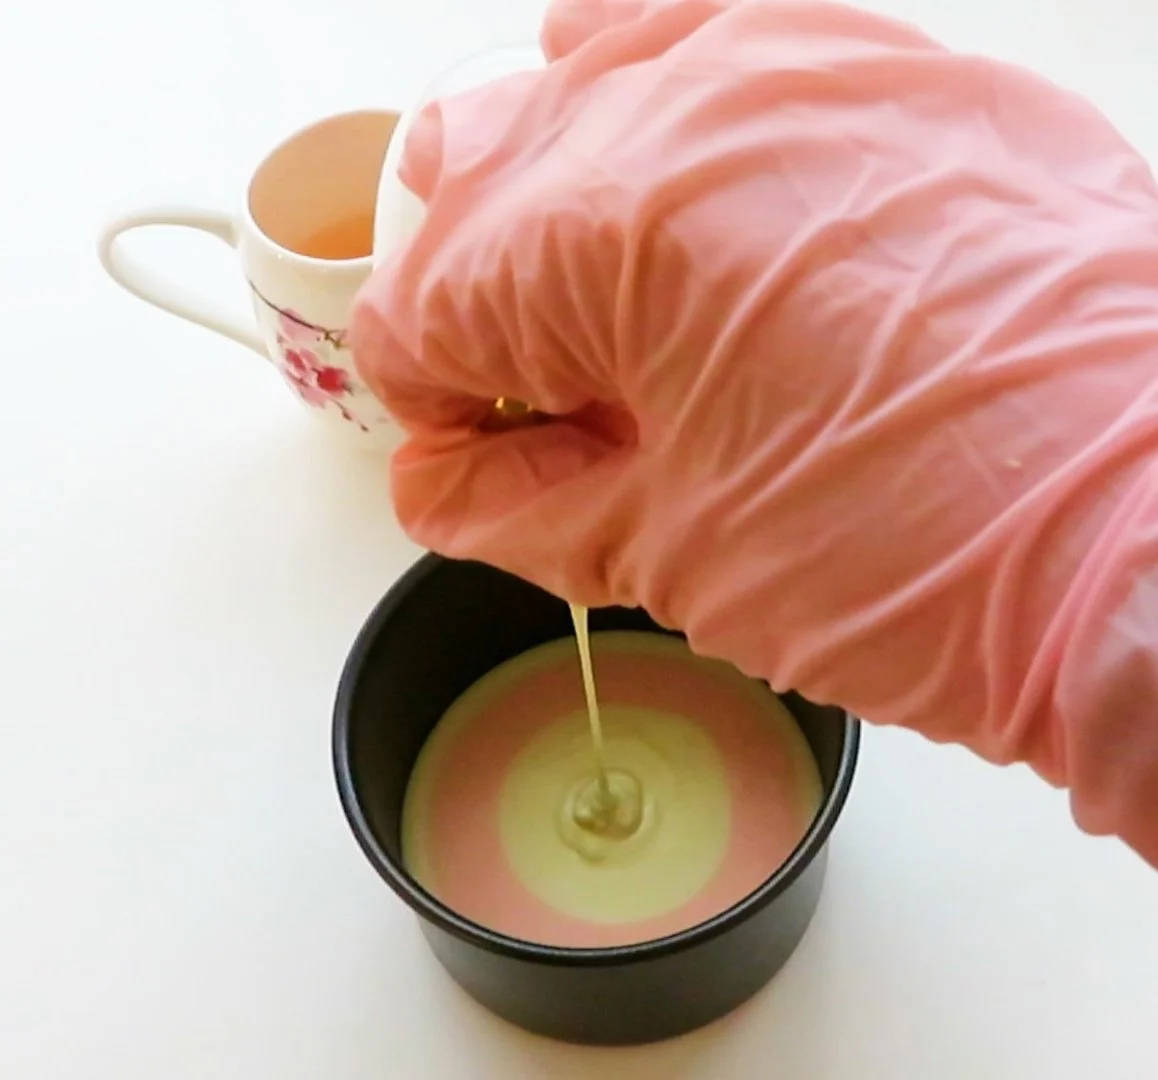
2. Pouring Technique
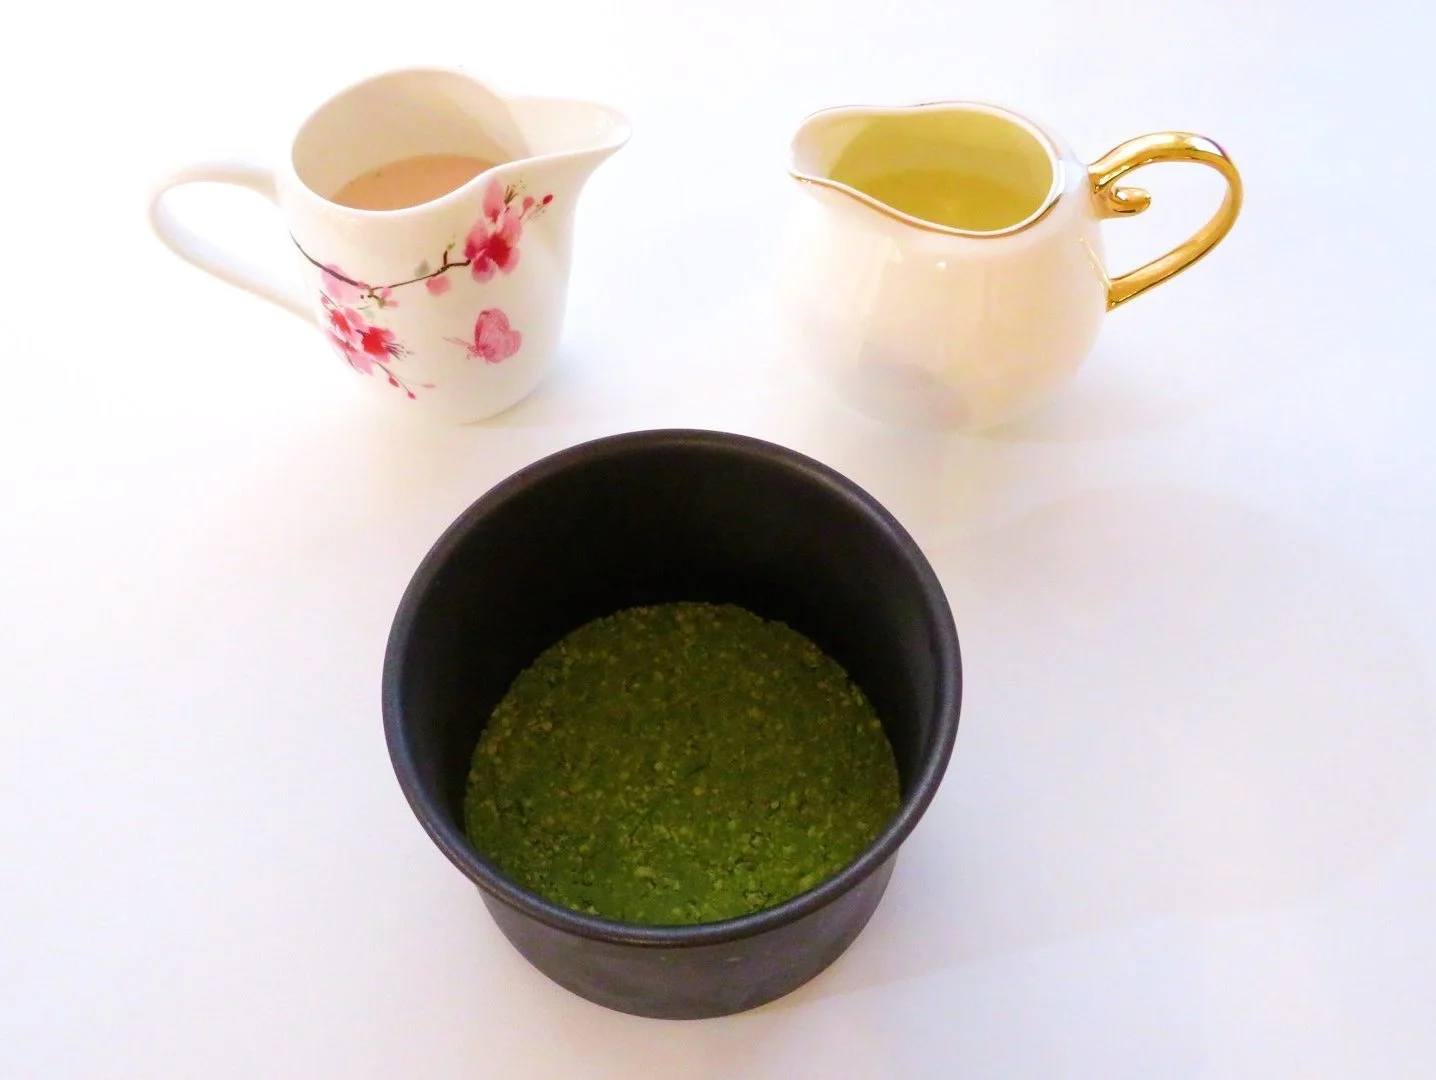
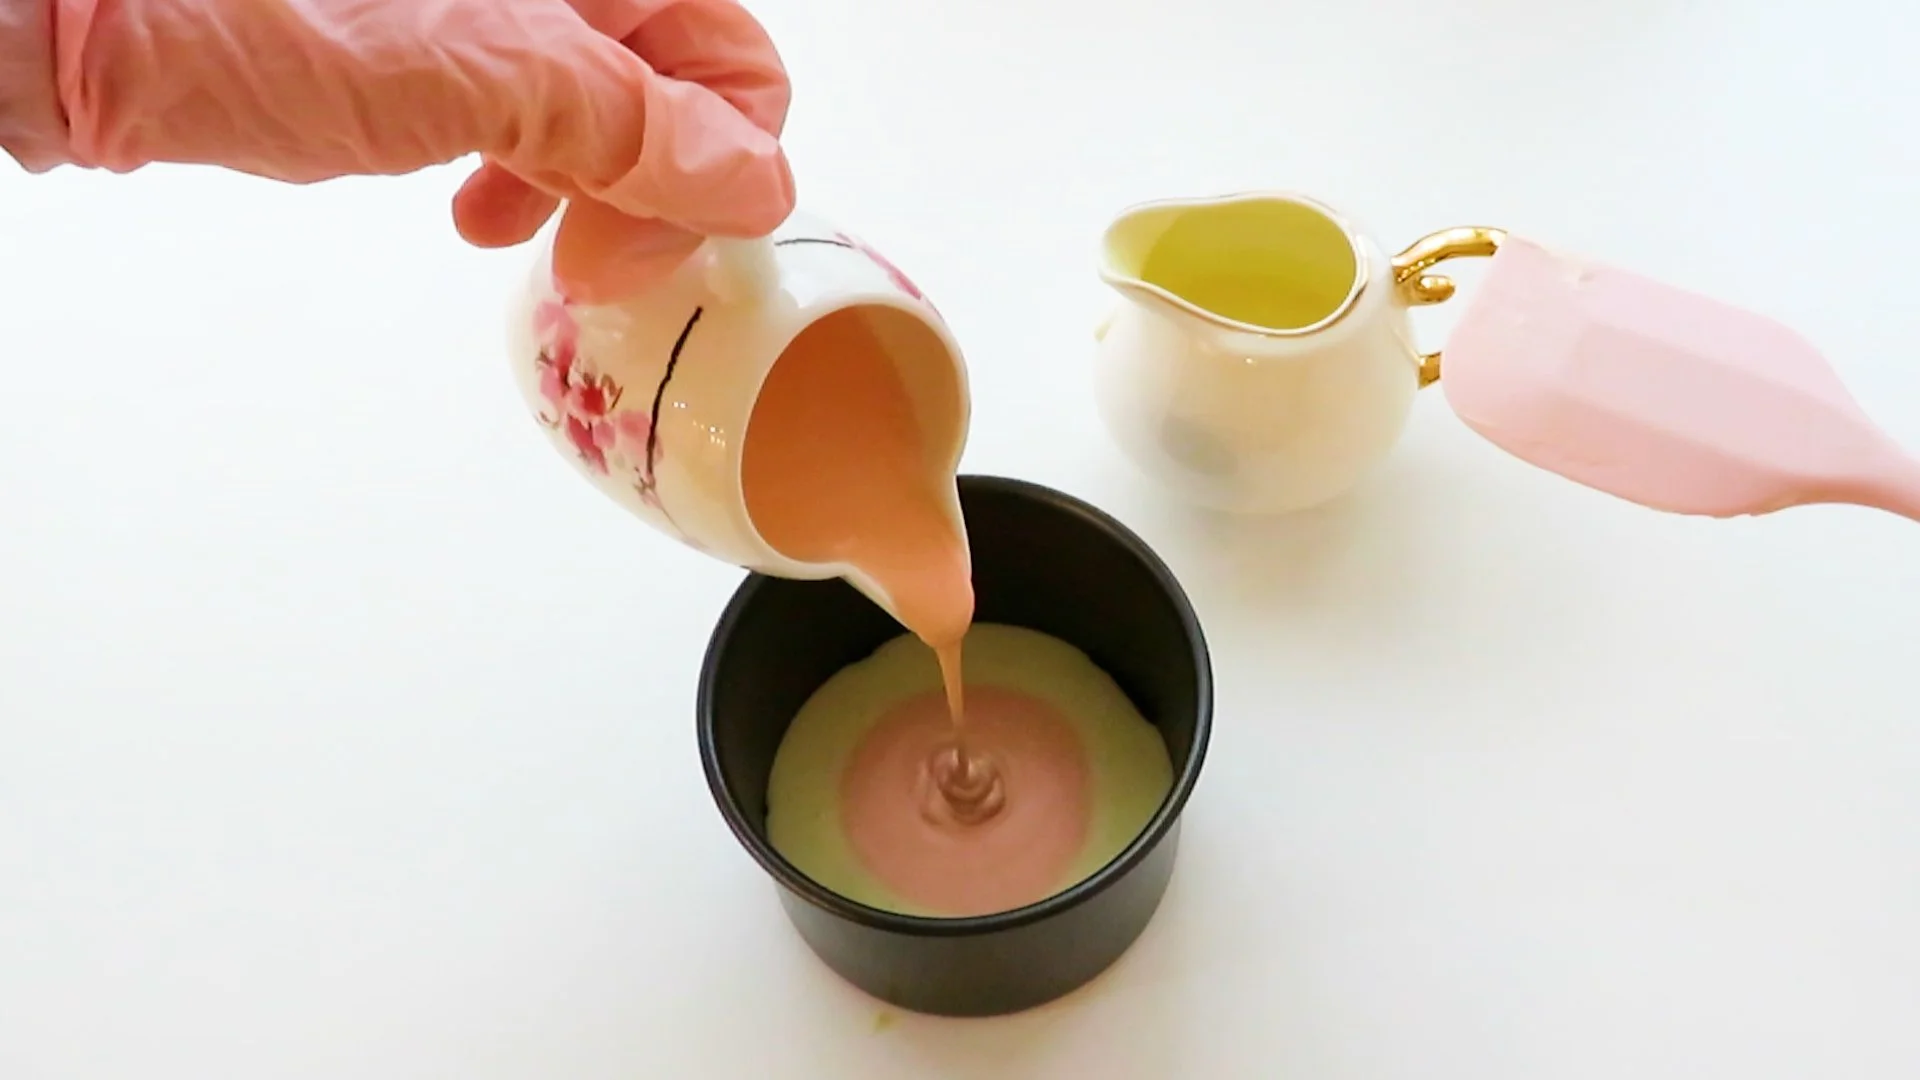
It is useful to watch the recipe video to understand this technique but I will also explain it here. First of all, to make things easier, I transfer my white and pink cheesecake fillings into two small pouring jugs/creamers.
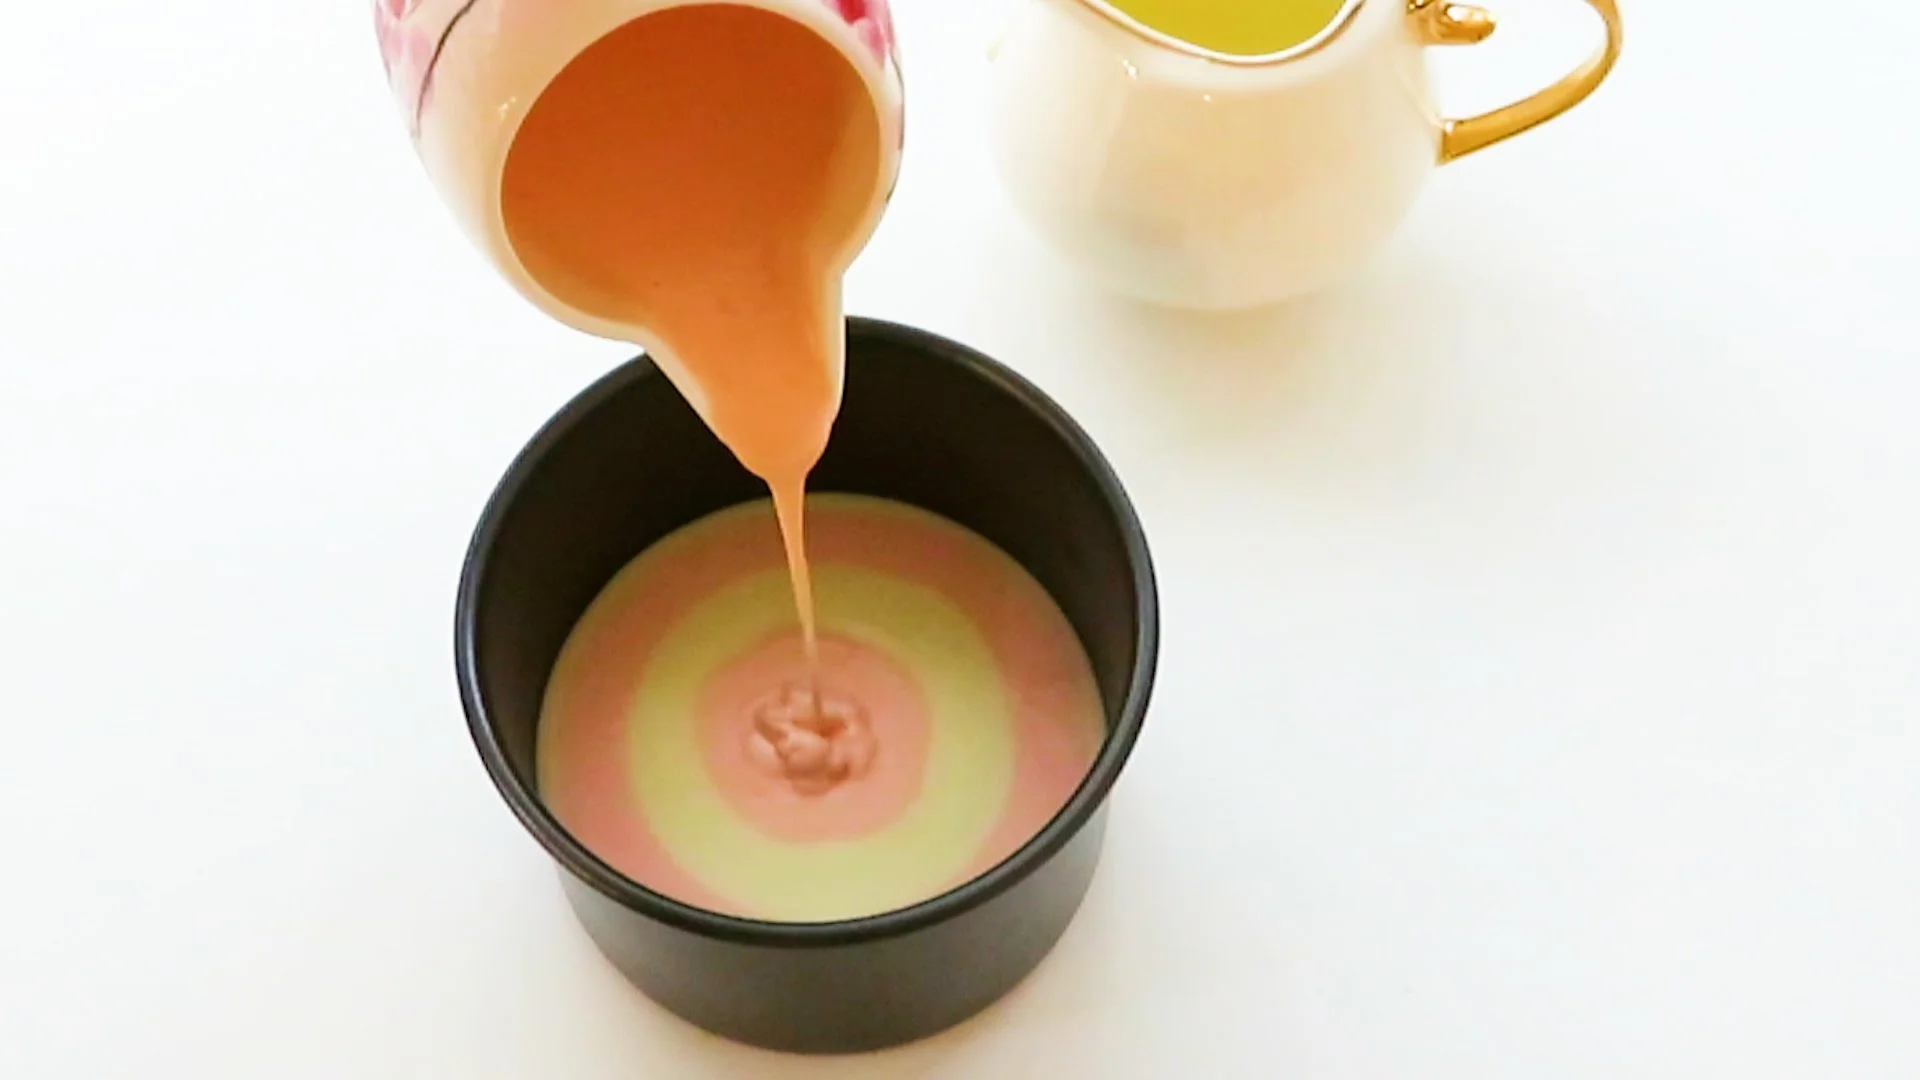
Then I take my cake tin with the matcha kitkat base and over the base pour in enough white cheesecake that it almost touches the edges of the cake tin. I then take my pink cheesecake and pour it in the centre over the white cheesecake - just pour directly in the centre and watch as a pink circle naturally emerges and spreads - you will notice that the pink cheesecake will sink into the white, creating a pink circle that will continue growing larger and spreading outwards. Allow it to spread until it leaves just a thick ring of white filling like a border - so it will look like a pink cheesecake with a white border. Then take your white cheesecake again and pour it into the centre of the pink, creating another spreading circle. You will notice that each new circle will push the previous circle outwards towards the edges of the cake tin and make a ring. Every time you add a new circle and the further you allow it to push outwards, the thinner the previous rings will become. If the outermost rings seem to disappear entirely as they are pushed outwards and replaced, don’t worry, that’s fine. These rings will join the pattern on the side and inside of the cheesecake which you will see when it is unmoulded.
Continue alternating between pouring these circles until you have used up all of the pink and white cheesecake filling.
FRIDGE OR FREEZER
This no bake cheesecake needs to be set in the freezer. It will not fully set in the fridge.
Remember to allow your cheesecake to thaw for a couple of minutes before unmoulding and serving.
HOW LONG DOES NO BAKE CHEESECAKE TAKE TO SET?
I recommend leaving this cheesecake in the freezer overnight (or at least 8 hours) to set. It is similar to an ice cream cake in that it will start to melt at room temperature so do not remove it from the freezer until you are ready to serve and eat the cheesecake :)
Remember to allow your cheesecake to thaw for a couple of minutes before unmoulding and serving.
THE TRADE-OFF: SAVE your TIME TO LOSE the dessert’s TIME!
What do I mean by this?
As I said in the beginning of this post, this no bake, freezer cheesecake is far easier and quicker to prepare than the average no bake cheesecake which uses additional ingredients and is set in the fridge. This saves you a lot a time and energy when preparing the cheesecake itself.
However, there is a trade-off for saving that time and energy and it is that this cheesecake is set in the freezer, and therefore served like a frozen dessert such as an ice cream cake. It needs to be eaten right away when served because it will start to slowly melt at room temperature. This is different to a fridge set cheesecake which contains gelatine and therefore will not melt at room temperature.
So you save time but your dessert loses time as it cannot sit out for as long as a regular cheesecake can without starting to melt like Olaf!
VIDEO
RECIPE
Strawberry & Vanilla STRIPED CHEESECAKE (No Bake!)
Serves: 2
Cheesecake
Prep Time: 15 - 20 minutes
Freezing Time: Overnight (or at least 8 hours)
Chocolate Dipped “Cherry Blossom” Strawberries
Prep Time:
15 minutes
Chill Time:
15 minutes
Recipe Difficulty: Easy / Beginner
INGREDIENTS
FOR THE CHEESECAKE BASE
4 small Matcha Latte Kitkats
1 1/2 tsps butter, melted
FOR THE CHEESECAKE FILLING
175g cream cheese, softened to room temperature
80ml condensed milk
1/2 tsp vanilla extract
2 tbsps strawberry puree
Optional:
Pink food colouring
FOR THE CHOCOLATE DIPPED “CHERRY BLOSSOM” STRAWBERRIES
3 small strawberries, washed
1/3 cup (50g) white chocolate buttons, chips or chopped chocolate
Oil based pink or red food colouring
METHOD
To prepare the cheesecake base:
Add Matcha Latte Kitkats to food processor and pulse until they have been crumbed.
Place Kitkat crumbs in a bowl and mix through the melted butter.
Then transfer to your non-stick or lined/greased cake tin (I use a 10cm diameter, non-stick cake tin) and press into a flat, even layer on the bottom of the cake tin to create a cheesecake base.
Place in the refrigerator for at least 10 minutes to set.
To prepare the cheesecake filling:
Add cream cheese to a medium sized bowl and using electric beaters, starting on low and then increasing to high speed, beat for 2 - 3 minutes until the cream cheese is light, smooth and creamy (see video).
Divide the cream cheese evenly between 2 bowls. To each bowl add 40ml of condensed milk.
To the first bowl, add vanilla extract and starting on medium, then increasing to high speed, beat for a couple of minutes until the ingredients have incorporated and the mixture has increased in volume.
To the second bowl, add strawberry puree and once again, starting on medium, then increasing to high speed, beat for a couple of minutes until the ingredients have incorporated and the mixture has increased in volume. If you want a more vibrant pink colour than the strawberry puree provides, beat in a little bit of pink food colouring also, to create your desired shade.
Transfer white and pink cheesecake fillings into two small pouring jugs/creamers. (It is useful to watch the video to understand the following pouring technique but I will explain it here too). Take the cake tin with the matcha Kitkat base and over the base pour in enough white cheesecake that it almost touches the edges of the cake tin. Then take the pink cheesecake and pour it in the centre over the white cheesecake - just pour directly in the centre and watch as a pink circle naturally emerges and spreads - you will notice that the pink cheesecake will sink into the white, creating a pink circle that will continue growing larger and spreading outwards. Allow it to spread until it leaves just a thick ring of white filling like a border - so it will look like a pink cheesecake with a white border. Then take your white cheesecake again and pour it into the centre of the pink, creating another spreading circle. You will notice that each new circle will push the previous circle outwards towards the edges of the cake tin and make a ring. Every time you add a new circle and the further you allow it to push outwards, the thinner the previous rings will become. If the outermost rings seem to disappear entirely as they are pushed outwards and replaced, don’t worry, that’s fine. These rings will join the pattern on the side and inside of the cheesecake which you will see when it is unmoulded.
Continue alternating between pouring these circles until you have used up all of the pink and white cheesecake filling and a beautiful pattern has been created.
Cover the cake tin with cling wrap and place in the freezer overnight (or for at least 8 hours) to allow the cheesecake to set.
To prepare the chocolate dipped “cherry blossom” strawberries:
Pat washed strawberries dry with a clean tea towel.
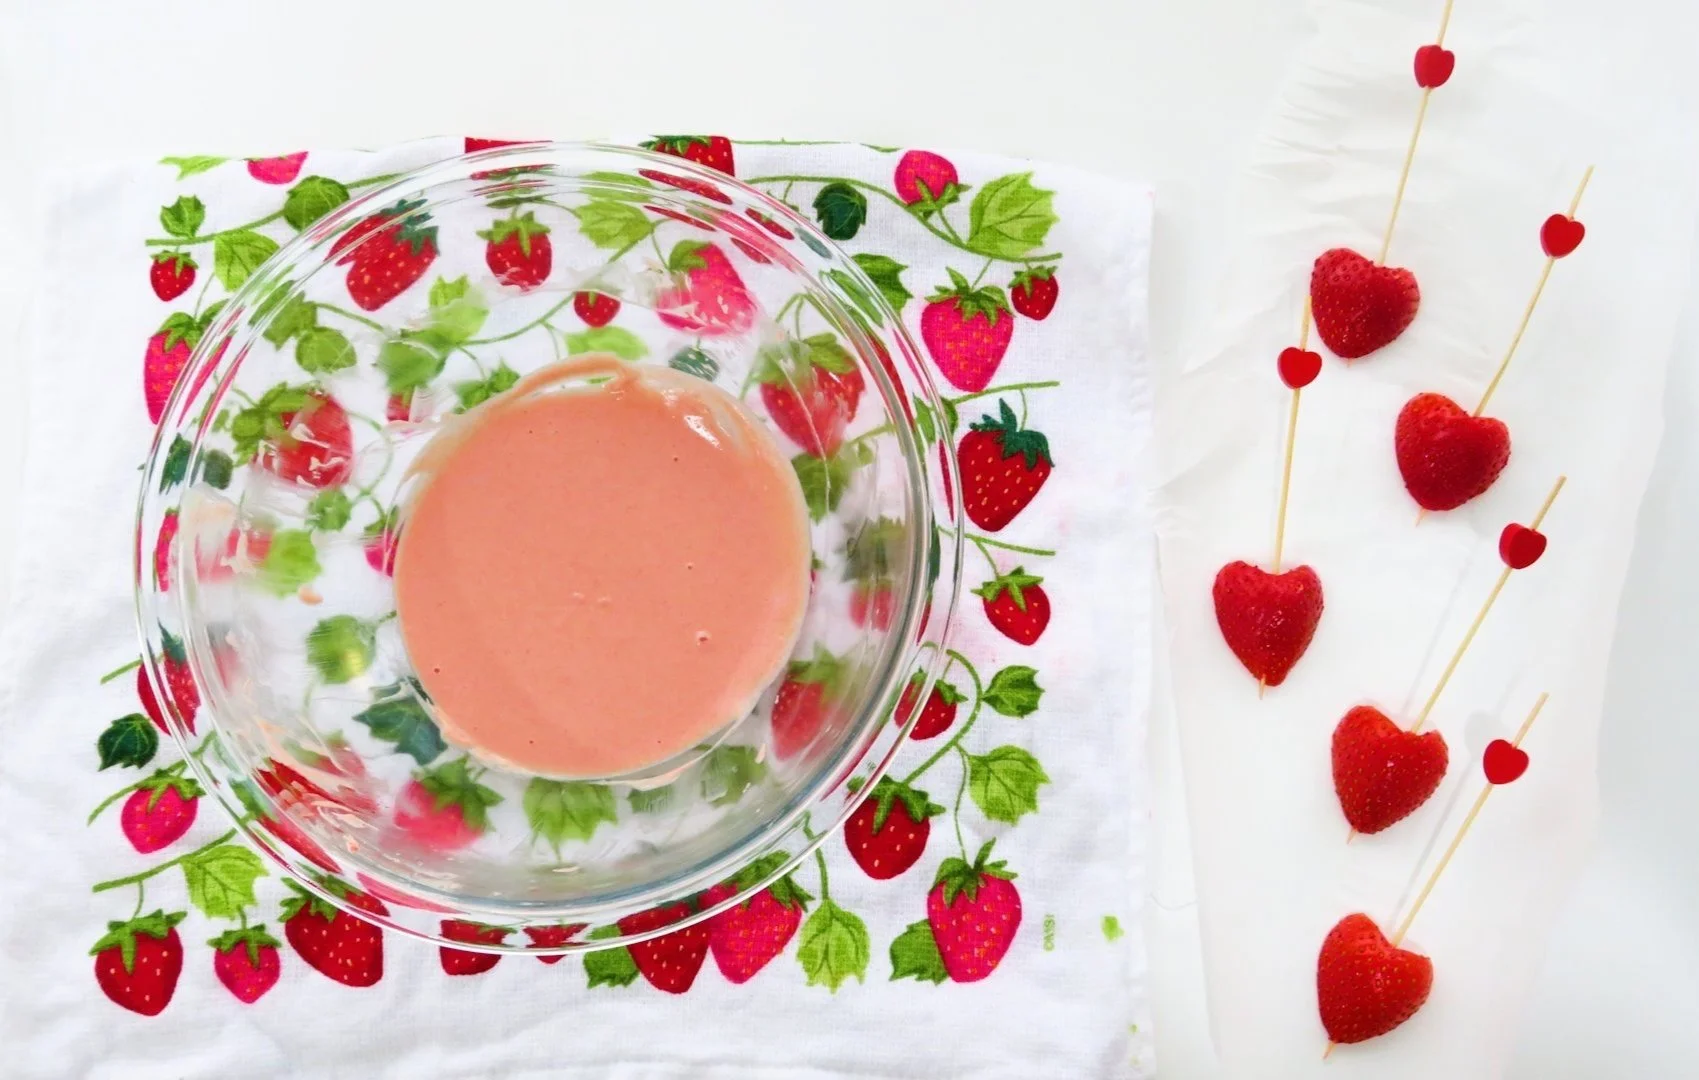
Cut the tops off the strawberries, slice them in half and then slice a triangle out of the top of each strawberry half (see video) to create a petal shape. When 5 of these “petals” are arranged together, they give the shape and appearance of a cherry blossom! You could stop here and simply use the strawberries as a garnish, but if you want to go all out and complete the effect, dip the strawberries into pink or white chocolate and you will have a beautiful pink cherry blossom decoration for your cheesecake! To do this…
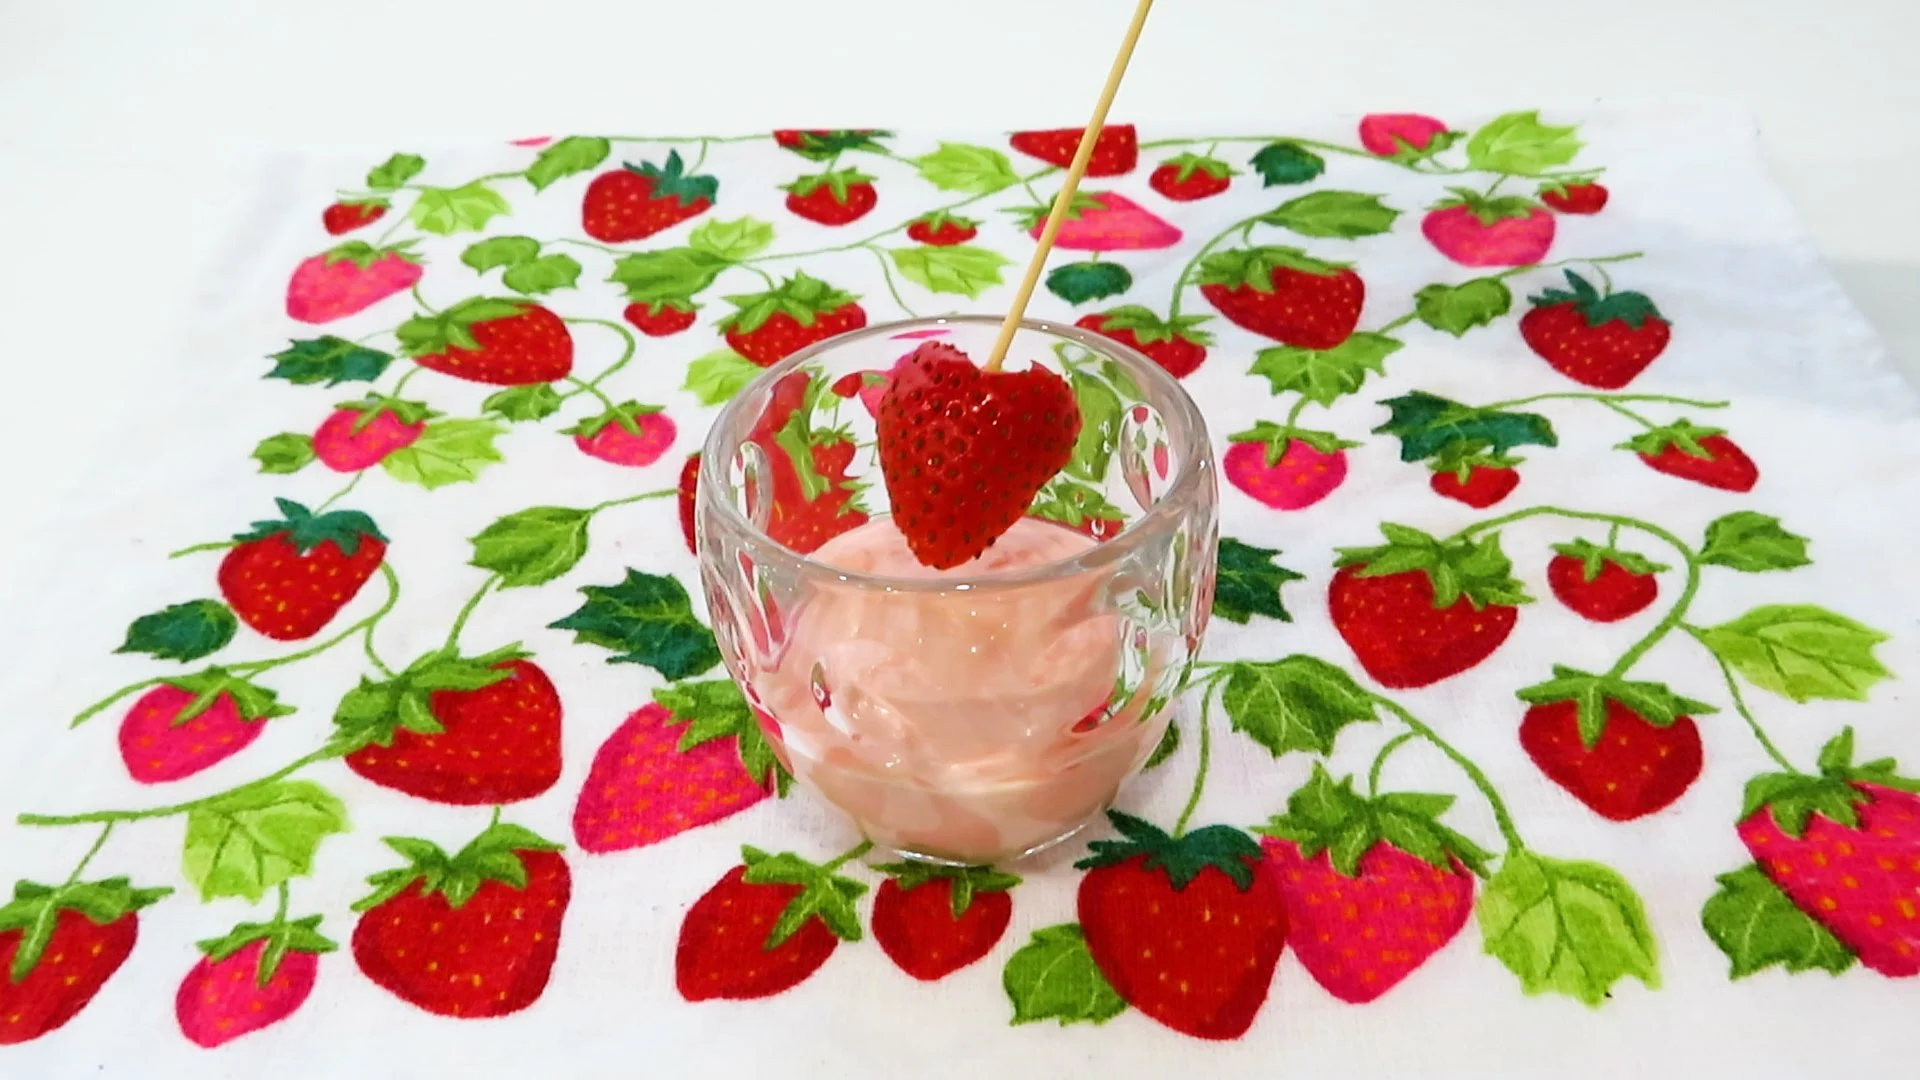
Pat strawberries dry once more to remove excess moisture released from slicing and skewer each strawberry “petal” with a toothpick, so that the bottom of the toothpick only just pokes out of the bottom of the strawberry. Set aside these while you melt the chocolate.
Fill a small pot with about an inch of water. Set a heatproof glass bowl over the pot, and bring the water in the pot to a low simmer. This creates a double-boiler.
Add white chocolate to the bowl and allow to melt (2 - 3 minutes)
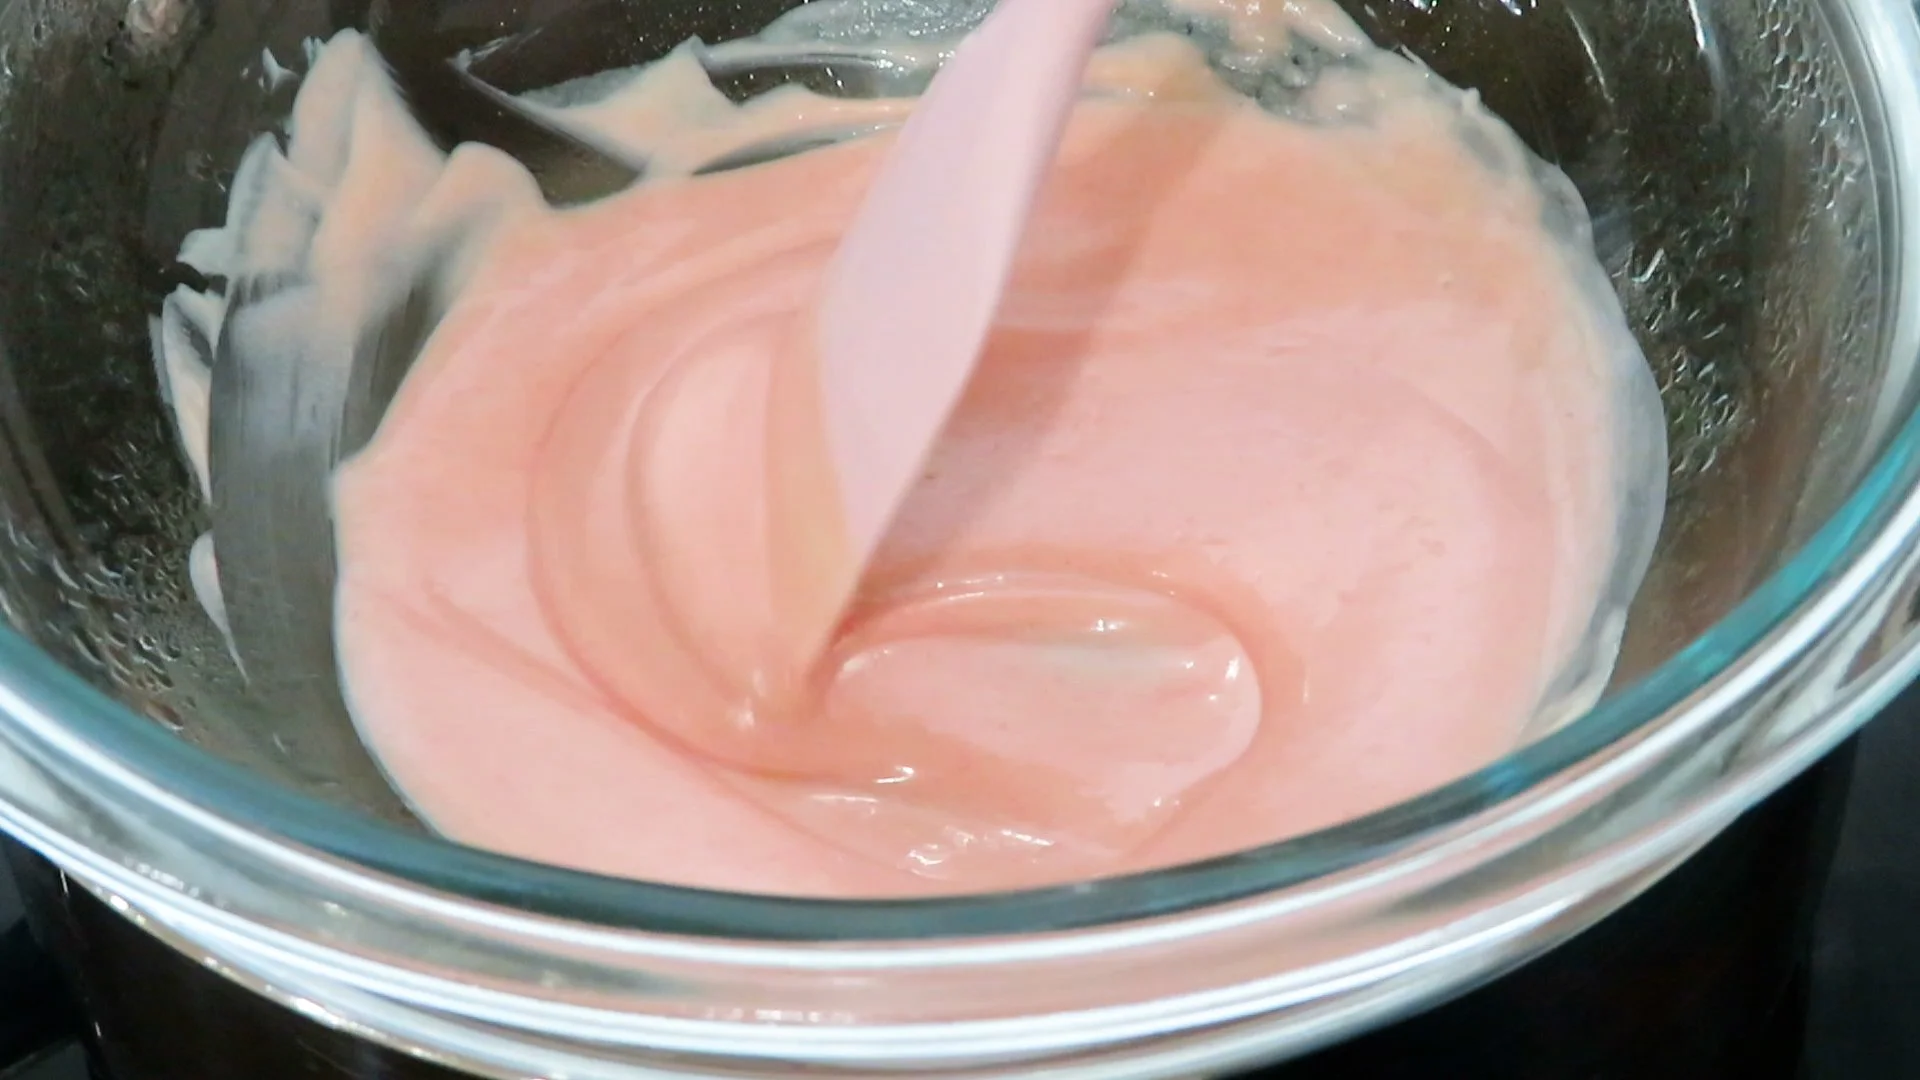
Once the chocolate has melted, add oil-based pink food colouring or add oil-based red food colouring, a little bit at a time, mixing to incorporate until the desired shade of pink is achieved.
Turn off heat and transfer the melted pink chocolate to a tall, narrow vessel like a glass, which can allow you to dip the strawberries vertically into the chocolate.
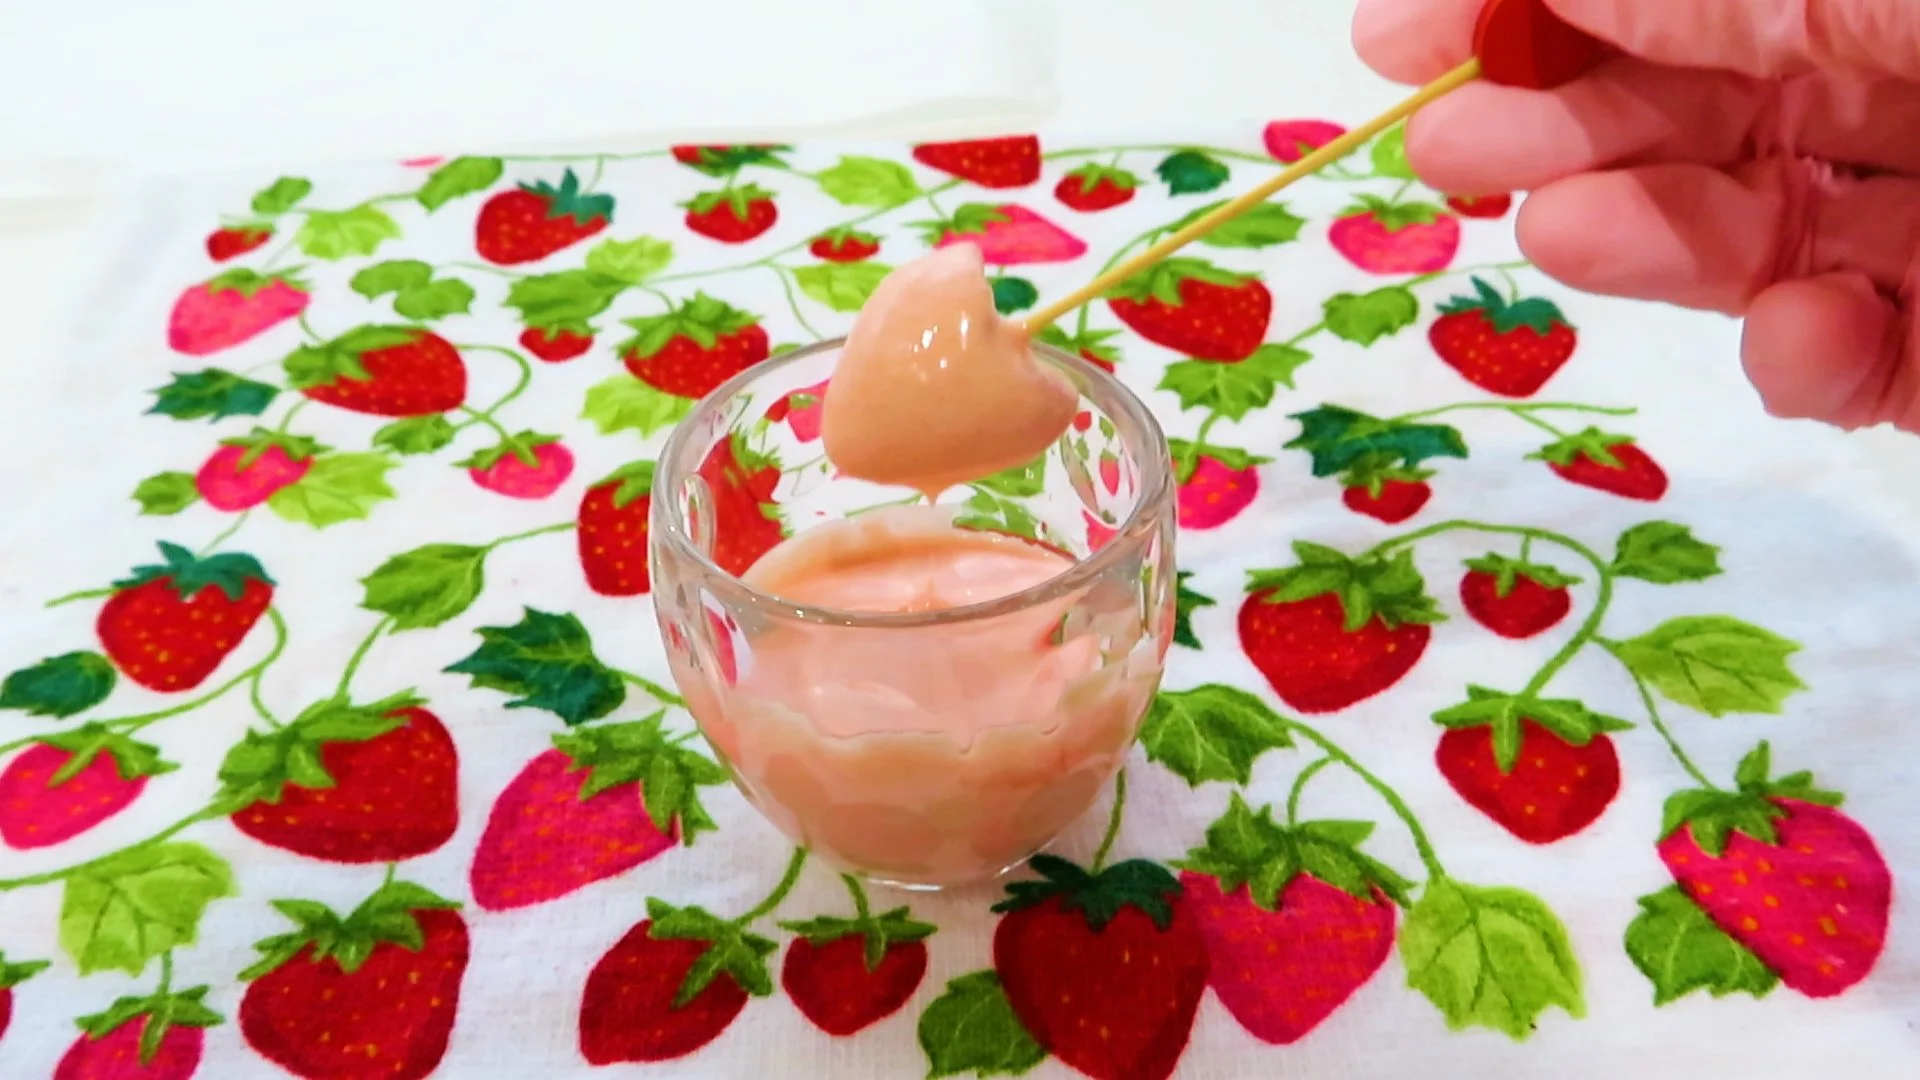
One at a time, dip your strawberries into the chocolate so that they are completely coated. If you don’t want what is called a “foot” - basically extra chocolate that pools around the base - to develop around your chocolate dipped strawberry, hold it for a few seconds above the chocolate after it’s been dipped to allow any excess chocolate to drip off
Place the chocolate dipped strawberries onto a tray lined with baking paper, gently slide out the toothpick and place in the fridge to set, about 15 minutes. Placing the baking paper on a tray, makes it easier to lift and move the strawberries into the fridge.
To assemble:
When ready to serve your cheesecake, remove it from the freezer and allow it to thaw for a couple of minutes.
Unmould the cheesecake and transfer to your serving dish.
Arrange five of the chocolate dipped strawberry “petals” in a cherry blossom shape on top of the cheesecake.
Serve and enjoy!
NOTE: This cheesecake is set in the freezer and similar to an ice cream cake, it needs to be eaten right away when served because it will start to slowly melt at room temperature.
You may also find it easier to cut this cheesecake with a warmed knife

If you tried this recipe…
I’d love to know!
Please leave a comment below and let me know your thoughts on this Striped Cheesecake :)
You Might Also Like to TRY THESE RECIPES NEXT!


